

Installing Proxmox
So you’re starting a home lab?
So you decided to install Proxmox on a spare computer or maybe even have a server. Well, lets get started so we can get to the fun part!
Prerequisites
At the time of this writing Proxmox currently recommends for testing:
- CPU: 64bit (Intel EMT64 or AMD64)
- Intel VT/AMD-V capable CPU/Mainboard (for KVM full virtualization support)
- Minimum 1 GB RAM (more is needed for hosts and optimal performance)
- Hard drive
- One NIC
- Supported Web Browser to access the web interface
Fair Warning!
Proxmox actually has a good set of instructions, this is going to cover a basic installation of the software, but if you want to read the guide from Proxmox here it is.
Step 1 — Download the ISO:
[ISO (PVE)
Edit descriptionproxmox.com](https://proxmox.com/en/downloads/proxmox-virtual-environment/iso "https://proxmox.com/en/downloads/proxmox-virtual-environment/iso")

Proxmox ISO Download (version might be different)
Step 2 — Prepare Installation Media:
You can either burn the image (ISO) to a disc or you can use a tool to make a bootable drive. My recommendation is the bootable drive. I recommend balenaEtcher for MacOS/Windows and a Windows alternative is Rufus. Both are linked here so you can follow that software's respective directions. In most cases, it is generally drag and drop.

A screenshot from the balenaEtcher website
Step 3 — Boot from Proxmox Installation Media:
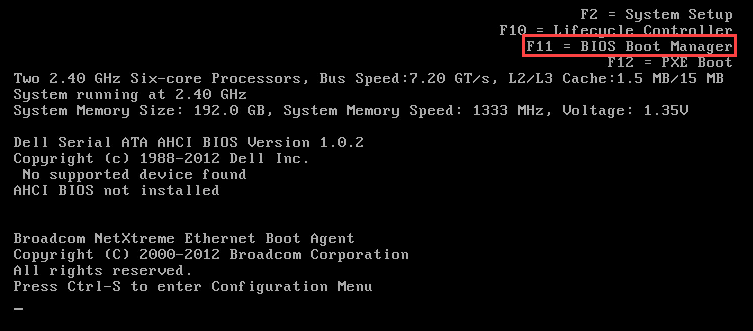
On the powered off machine that you are going to install Proxmox, insert the installation media. Boot up the machine and when the boot screen is up press the corresponding key for the “Boot Menu”. It would be one of the F keys or the “ESC” key.
In the case of the R420 pictured below, the boot manager is “F11”
R420 Boot Screen
- Select “Install Proxmox VE (Graphical)”.

2. If you agree, then proceed with the End User License Agreement.

3. Choose your respective time zone and locale.

4. Input a password for your admin credentials. Please choose a strong password…don’t use “password” like I did for the purposes of this demo.

5. Give the server its IP Address, gateway, and DNS. This can be found from other devices on your network — if you want it to have internet access. This can be modified after the fact.

6. Finally, you get a summary of the selections you made. Click “Install” and wait for the system to reboot. Once it proceeds to reboot you should remove the installation media.

Step 3 — Access the Web Interface:
Look at you! We’re almost done with setting up a virtualization server. Once the system boots we can access the web interface. The address can be found on the screen once it has loaded. Should look like this:

Once you access that page in the browser you should receive a warning that your connection isn’t private, this is because it is using a Self-Signed certificate for Proxmox. Click Advanced and continue anyway.

Go ahead and login with the password you used during setup.

Step 4 — Secure Your Account (Kind of Optional…):
Now this part isn’t mandatory for Proxmox per se…but I believe if multi-factor authentication is available, it should be used. To find it go to the top right and click the profile icon and “TFA”.

Then click “Add” and either “TOTP” or “Yubico OTP” (if you have a YubiKey you want to use). Go through the setup and your account is now secure!

Step 5 — Celebrate:
Great job! You successfully installed a virtualization environment on a computer and can now create VM’s. We will talk about that next.


