

Setting Up Velociraptor
Deploy a Server and a Few Agents
Table of Contents:
- Why?
- Assumptions
- What is Velociraptor?
- How to Create a Velociraptor Server
- How to Generate a Client Configuration File
- How to Deploy to Windows
- How to Deploy to Linux
Looking to build a domain to test this all on? I cover that here. Looking to install VM’s to test this? Check that out here.
Why?
One of the main reasons I decided to finally start writing this blog was because I recently returned from a rather long Cyber Incident Response Exercise, one of the main tasks I end up performing every year is the installation of Velociraptor on our network and helping other teams work their way through it. So, I am hoping this acts as a good roadmap for someone attempting to deploy Velociraptor on their network.
Assumptions
This walkthrough assumes that you have a Windows Server machine, Windows 10 machine, and an Ubuntu machine. The Server machine is not necessary and neither is a domain controller, I am demoing on a domain controller since you will see it in most environments. If you do not have one, you can just use the local credentials of the machine you are working on.
What is Velociraptor?

Velociraptor IR is an open-source software run by Rapid7. They describe Velociraptor as:
Velociraptor is a unique, advanced open-source endpoint monitoring, digital forensic and cyber response platform. It provides you with the ability to more effectively respond to a wide range of digital forensic and cyber incident response investigations and data breaches.
It is an extremely powerful tool that can be a force multiplier during IR engagements, the advantage of it being open source allows anyone to train on a great tool and gain an educational advantage.
How to Create a Velociraptor Server
Start by heading over to the Velociraptor downloads page and downloading the binary for your respective “server” operating system. I am actually going to use a Windows 10 machine for my server, my reasoning is I am simulating a machine taken to an incident response.

- Right click on the start menu and open an Administrative PowerShell session.

2. Type in the following commands to generate the server configuration file. The directory you “cd” into will be wherever your Velociraptor binary is located.
cd C:\Users\yourusername\Downloads\
.\velociraptor-v0.72.3-windows-amd64.exe config generate > server.config.yaml
3. The recommendation I generally make is to open the configuration file (double click on it and choose Notepad) and change 2 sections, the client server url and the gui bind address. You generally want to change them to your machines STATIC IP address, if you choose to use the name of the machine instead you might run into DNS resolution issues depending on where your box sits in the network.
Client:
server_urls:
- https://yourmachinesipaddress:8000/
....
GUI:
bind_address: yourmachinesipaddress
bind_port: 8889
4. Now we can create a few users, I will be creating two for this demo: Jose and Josh. After you input the command it should ask you for the users password. You always have the option to add users later with the gui.
cd C:\Users\yourusername\Downloads\
.\velociraptor-v0.72.3-windows-amd64.exe --config server.config.yaml user add jose --role=administrator
.\velociraptor-v0.72.3-windows-amd64.exe --config server.config.yaml user add josh --role=administrator
5. We can go ahead and start up our server now
.\velociraptor-v0.72.3-windows-amd64.exe --config server.config.yaml frontend
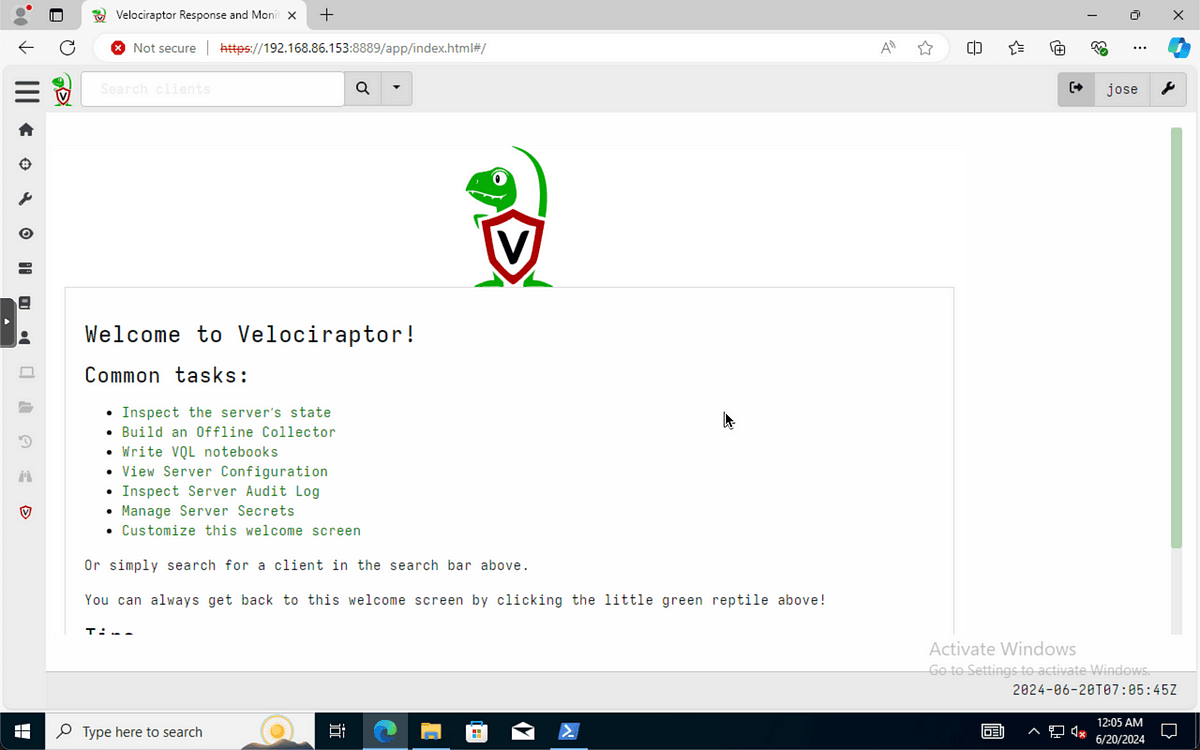
We now have a working Velociraptor server!
How to Generate a Client Configuration File
Now to generate the file we deploy to our clients. Right click on the start menu and open an Admin PowerShell session. Then type the following commands:
cd C:\Users\yourusername\Downloads\
.\velociraptor-v0.72.3-windows-amd64.exe --config server.config.yaml config client > client.config.yaml
Normal disclaimer, Velociraptor does a great job explaining the deployment of clients here. There are tons of options for deployment!
How to Deploy to Windows
For the sake of demonstration, I am going to create a share with read permissions for “Everyone” on my Windows machine that contains the installer binary and the client.config.yaml. You can also use something on the domain controller like the SYSVOL folder or a general file share. For my share I created a folder called “C:\share” and will access it via UNC path. Right clicked on the folder, went to Properties > Sharing > Advanced Sharing > Share this folder > Permissions > Everyone (Read).
- I am going to access this machine with PowerShell at the console for this VM, but you can also deploy to multiple machines with a tool such as PSExec and a remote command line. The command below will install Velociraptor as a service, so when the machine cycles power it reconnects.
# On the target machine we can run
.\velociraptor-v0.72.3-windows-amd64.exe --config client.config.yaml service install
Now if you go back to the Velociraptor server you can see we have a new client.

How to Deploy to Linux
Start by heading over to the Velociraptor downloads page and downloading the binary for your Linux system. In this case I am going to use sftp to put the binary on the Linux box.
- SFTP into the box to put the client.config.yaml and Linux binary on the OS. The output should look like the screenshot below.
sftp username@ipaddress
sftp> put velociraptor.filename /home/username
sftp> put client.config.yaml /home/username

2. Now we are going to SSH into the system using the below commands. What are going to do here as well is generate a Linux client installer with the client file built in. Once we do that we only have to install a single file. The screenshot below captures the output of a successul install.
# SSH into the system
ssh username@ipaddress
# Generate the debian client with the config file
./velociraptor-linuxfilename --config client.config.yaml debian client
# Install the newly created debian package
sudo dpkg -i velociraptor_client_0.72.3_amd64.deb

3. We can head back to our Velociraptor server. Check it out! The Linux box is now communicating.

Great job! You finished it all. There is TONS you can do with Velociraptor now. For more information I recommend checking out their YouTube channel here.


